

Cursor
Configure Cursor IDE to use Large Language Models hosted by Kimchi.
This tutorial walks you through configuring Cursor to use an OpenAI-compatible API to access LLMs hosted by Kimchi in Chat, inline edits, and Agent mode. You'll point Cursor at the Kimchi base URL so that all built-in AI features run through Kimchi infrastructure.
Overview
By the end of this tutorial, you'll be able to:
- Use Kimchi-hosted models through Cursor's native Chat and Agent modes
- Route all Cursor AI requests to Kimchi
- Switch between available models directly from Cursor's model selector
This tutorial is intended for developers who have a Cursor Pro subscription or higher. The free tier does not allow configuring custom API keys.
The Kimchi base URL works with any OpenAI-compatible client. This tutorial covers Cursor, but the same base URL and API key work with OpenCode and other compatible tools.
Prerequisites
Before starting, ensure you have:
- A Kimchi API key — Generate one from app.kimchi.dev/settings
- Cursor IDE — Download from cursor.com
- A Cursor Pro subscription or higher
Configure Cursor
Open Cursor Settings
Open Cursor and navigate to Cursor Settings:
- macOS: Menu bar > Cursor > Settings > Cursor Settings
- Windows/Linux: Menu bar > File > Settings > Cursor Settings
In the left sidebar, click Models.
Configure the OpenAI base URL
In the Models settings page, scroll down to API Keys and configure the following:
- Enter your Kimchi API key in the OpenAI API Key field, then toggle it ON.
- Toggle Override OpenAI Base URL to ON, then enter
https://llm.kimchi.dev/openai/v1in the field.
This tells Cursor to route all OpenAI-compatible requests through Kimchi instead of OpenAI's default endpoint.
Add models
In the same Models page, use the Add or search model field at the top to add the following models:
kimchi/kimi-k3kimchi/minimax-m3
The kimchi/ prefix is required because Cursor ships with its own built-in versions of some of these models under the same names. Without the prefix, Cursor routes requests to its own models rather than the ones hosted by Kimchi.
Toggle each model ON after adding it.
Your settings should look like this:
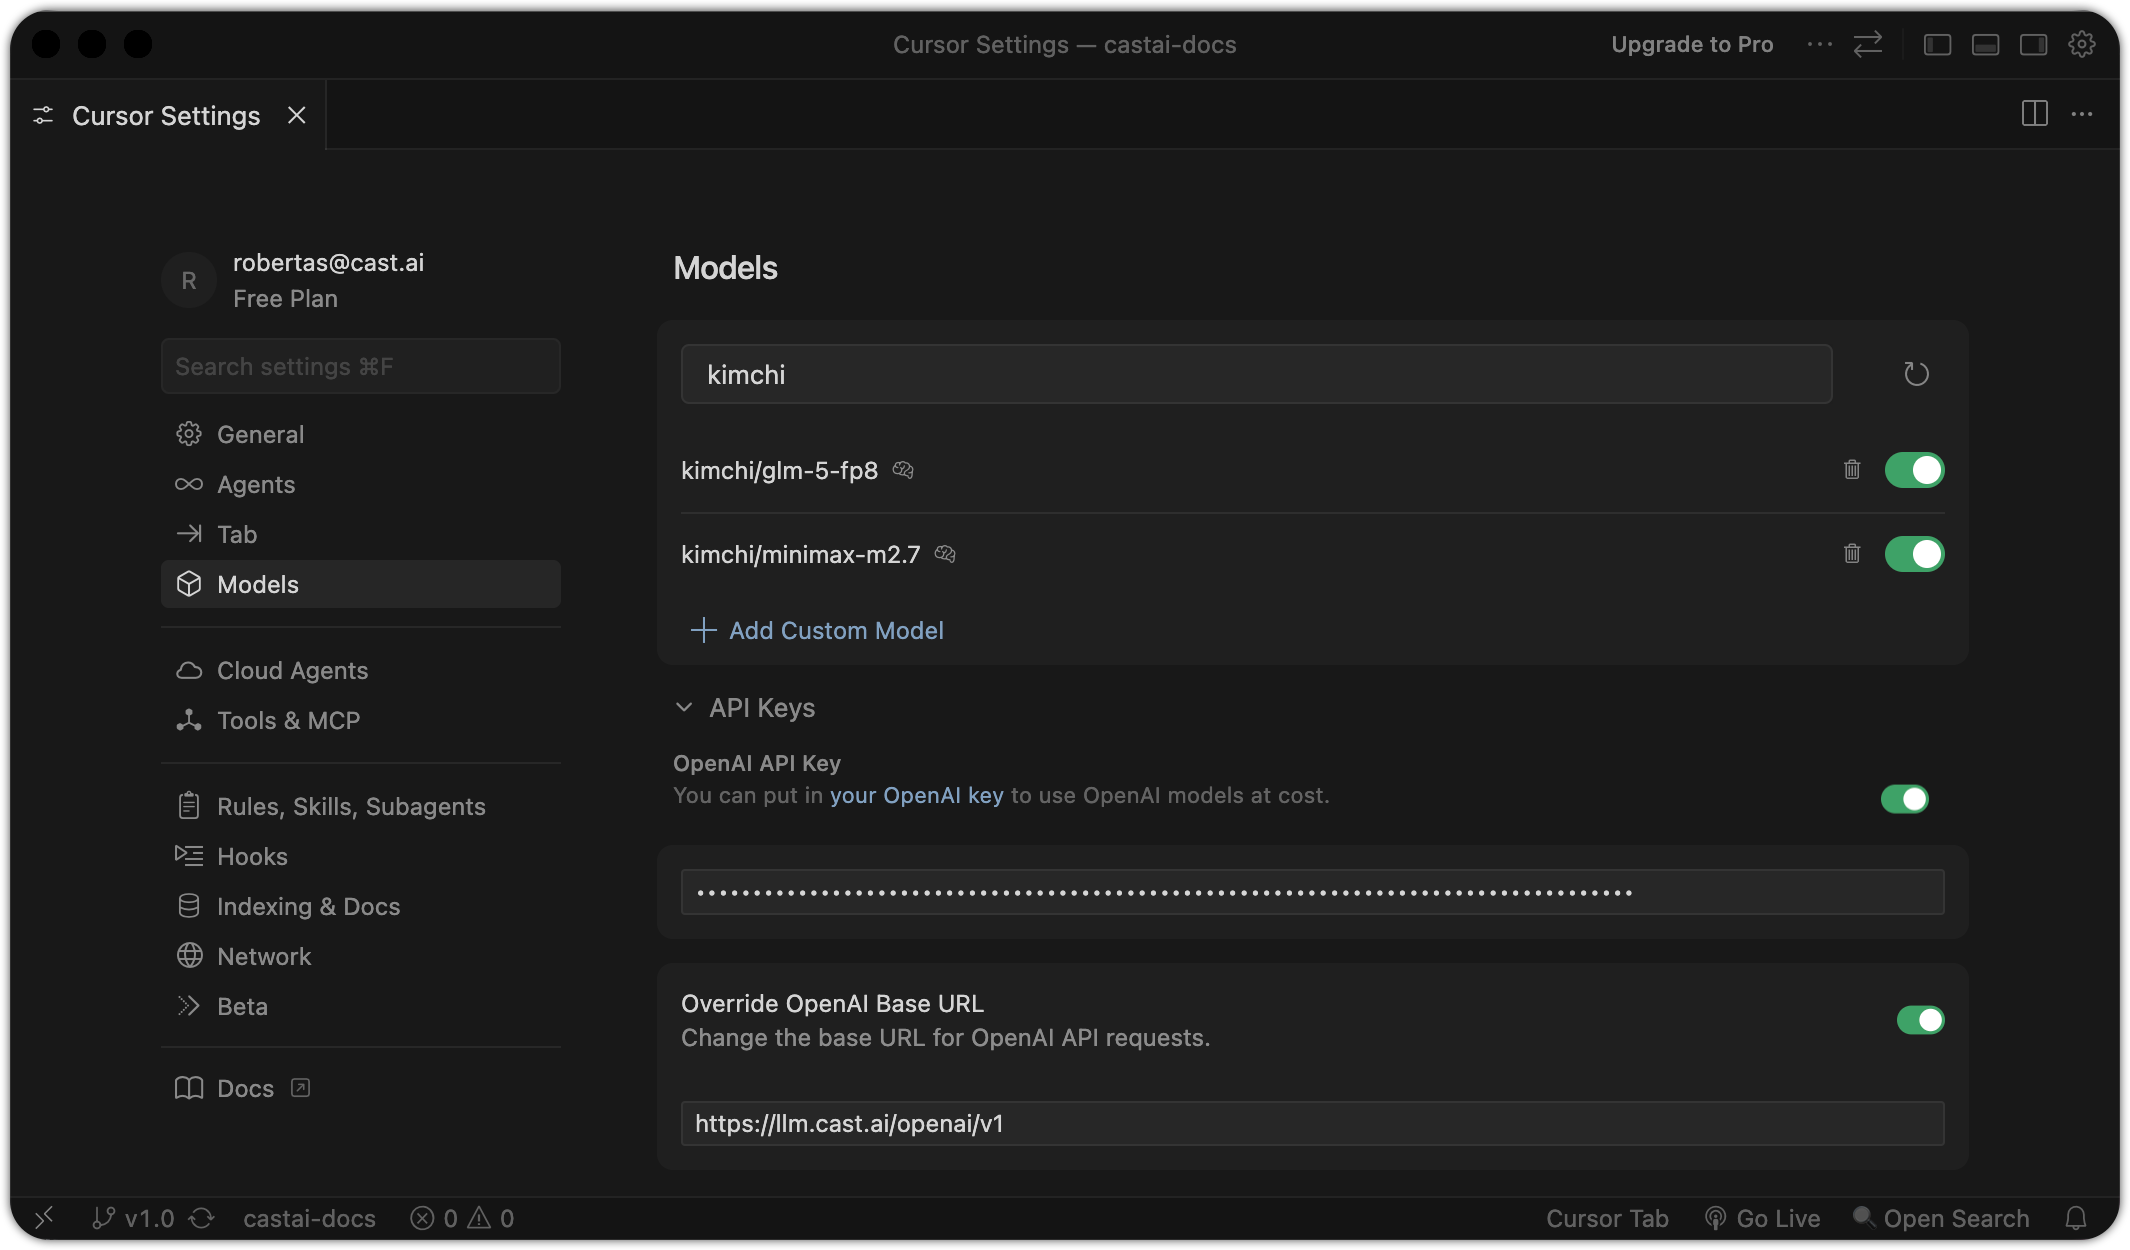
Cursor Settings — Models page with models enabled, API key and Override OpenAI Base URL configured
Verify your configuration
- Open Cursor Chat.
- Click the model selector at the bottom of the chat input panel and switch from Auto to one of the Kimchi models.
The model selector should show kimchi/kimi-k3 and kimchi/minimax-m3 as available options:
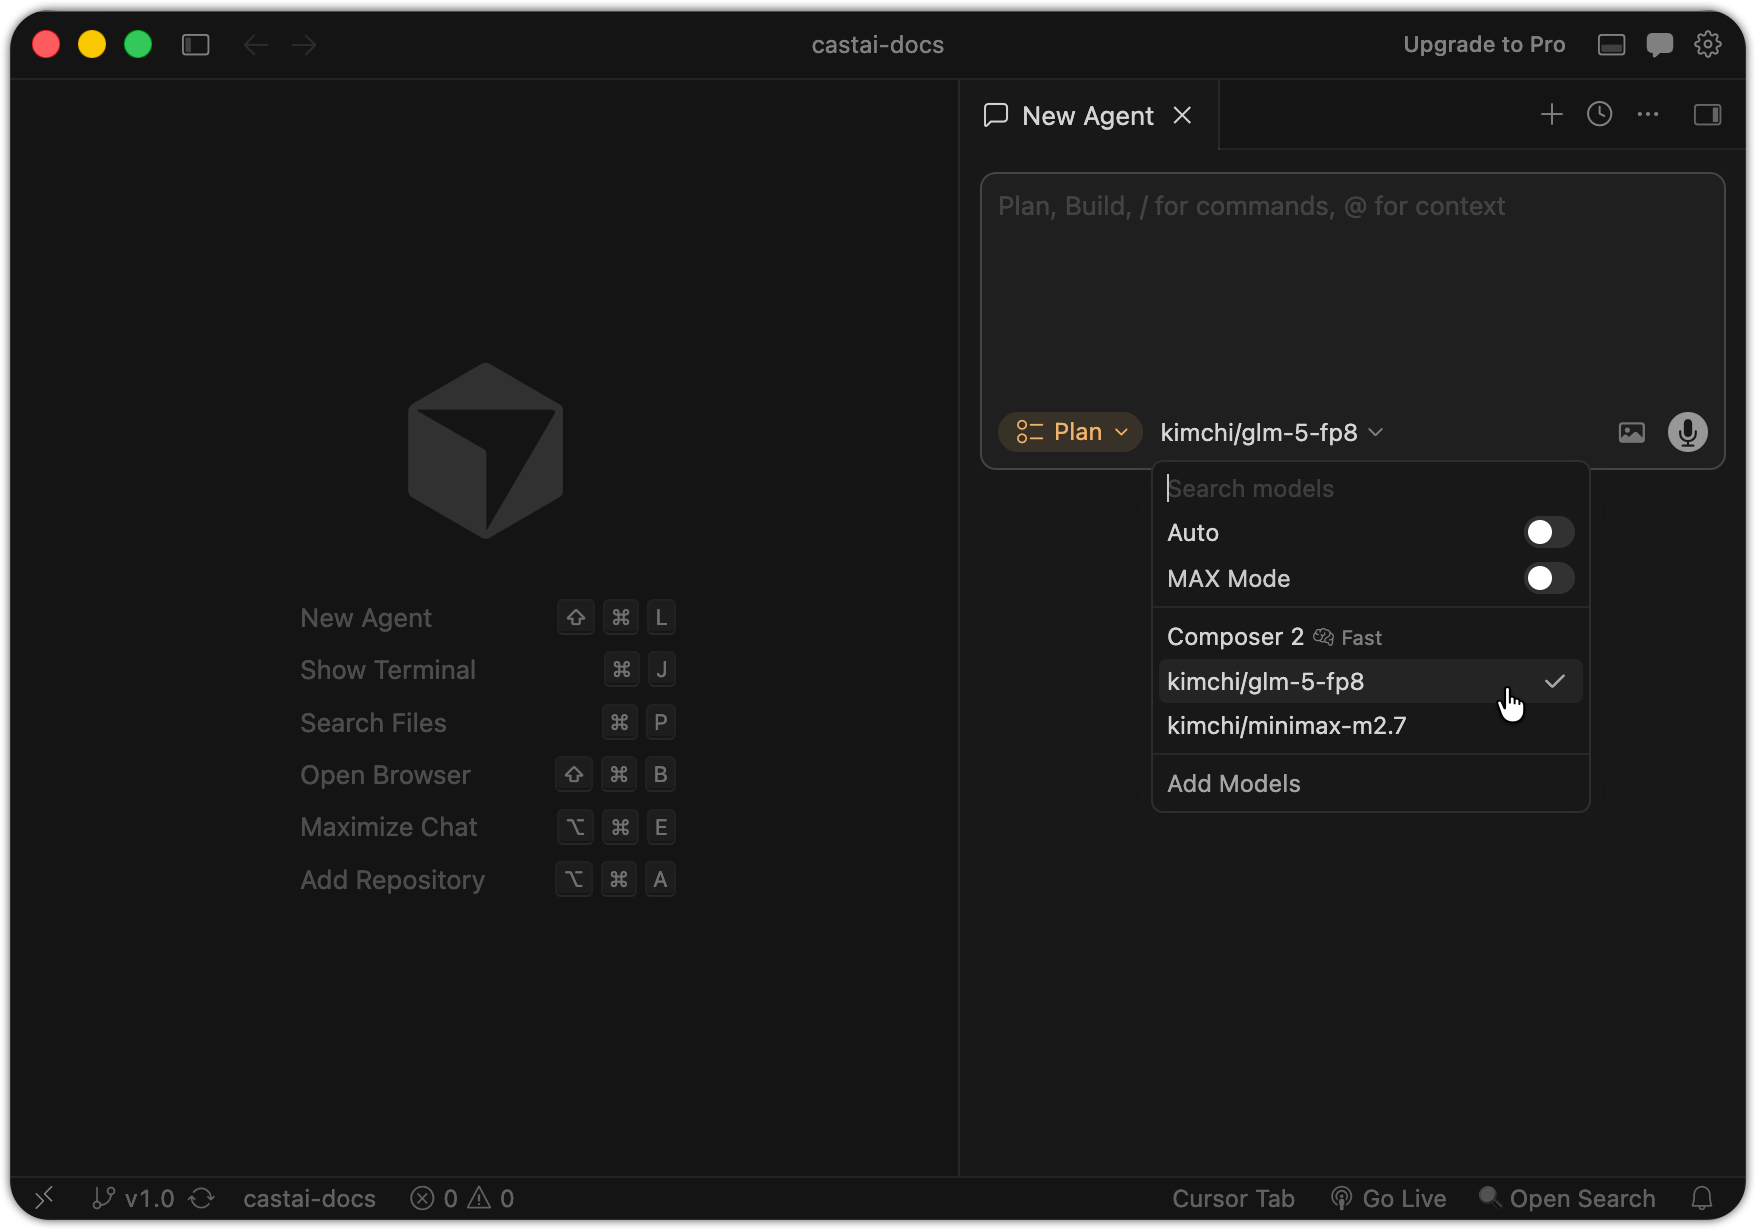
Cursor Chat — model selector showing a Kimchi model selected
Send a test prompt — for example, Hello. If you get a response, the connection is working.
Troubleshooting
"Model not found" after the integration was working
Cursor occasionally resets the OpenAI API Key toggle to OFF in the Models settings. If requests that previously worked start returning a "model not found" error, check that the OpenAI API Key toggle is still enabled. Re-enable it if needed — no other settings should be affected.
Next steps
Updated about 1 month ago