

Continue
Configure Continue to use Large Language Models hosted by Kimchi.
This tutorial configures Continue, an agentic coding tool available as a CLI and IDE extension, to use Large Language Models hosted by Kimchi.
This tutorial focuses on the Continue CLI. IDE extensions automatically pick up the same configuration file — see IDE integration after completing the CLI setup.
Overview
By the end of this tutorial, you'll be able to use Kimchi-hosted models with Continue in your terminal, VS Code, and JetBrains IDEs.
Prerequisites
- A Kimchi API key from app.kimchi.dev/settings
- Continue CLI installed — Follow the official install instructions.
Kimchi base URL is OpenAI-compatible. Although this tutorial covers Continue, the same pattern works for other tools that support third-party OpenAI-compatible providers.
Configure the CLI
Create the Continue configuration file
Create the configuration file for your OS:
~/.continue/config.yamlAdd the following content:
name: Kimchi Config
version: 1.0.0
schema: v1
model_defaults: &model_defaults
  provider: "openai"
  apiBase: "https://llm.kimchi.dev/openai/v1"
  apiKey: "YOUR_KIMCHI_API_KEY"
models:
  - name: "kimi-k3"
    model: "kimi-k3"
    <<: *model_defaults
  - name: "minimax-m3"
    model: "minimax-m3"
    <<: *model_defaults
Replace YOUR_KIMCHI_API_KEY with your Kimchi API key.
The model_defaults anchor (&model_defaults) avoids repeating the provider, base URL, and API key for each model.
Verify your configuration
Launch Continue with the --config flag:
cn --config ~/.continue/config.yamlSend a test prompt like Hello to confirm the connection.
IDE integration
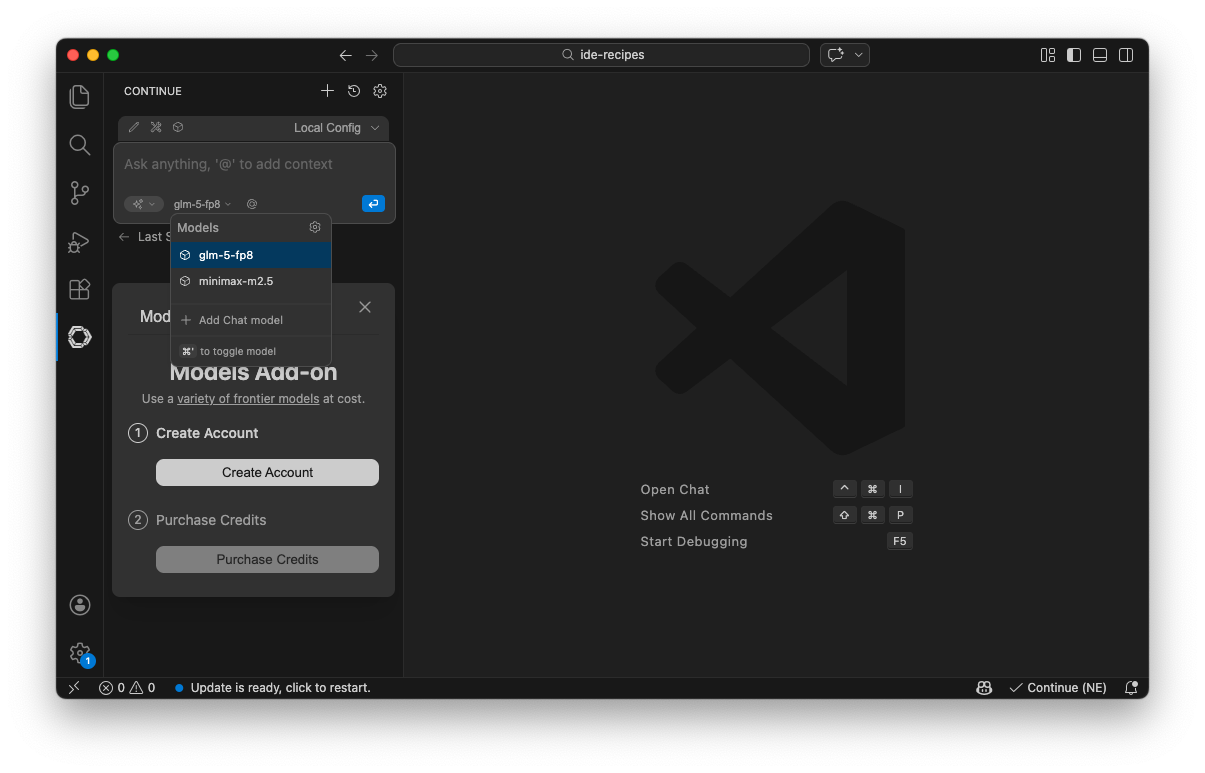
The configuration file is automatically recognized by Continue extensions for VS Code and JetBrains. No additional setup is needed — install the extension and it picks up the same config.
If the extension doesn't load the config, confirm that ~/.continue/config.yaml (macOS/Linux) or %USERPROFILE%\.continue\config.yaml (Windows) exists and contains valid YAML.
Install the extension
Install the Continue extension from the VS Code Marketplace.
Verify the connection
Open the Continue panel from the sidebar and send a test prompt. The Continue icon appears in the sidebar — clicking it opens the panel. Confirm that Local Config is loaded and the model selector points to a model from the config file.
Next steps
Updated about 1 month ago