

Connect AWS Bedrock
Register AWS Bedrock as a model provider in Kimchi with an IAM Role ARN or an access key, including the IAM permissions and trust policy the role needs.
Connect AWS Bedrock to Kimchi to run models from your own AWS account through the Kimchi OpenAI-compatible endpoint. Kimchi lists the Bedrock models your AWS account can access in the region you choose and routes requests from your tools. It reports usage and cost in the Kimchi console.
Before you start
- AWS Bedrock access in the region you plan to use. Kimchi only lists models available in the selected region.
- Permission to create IAM roles and policies in that AWS account.
- For the IAM Role ARN path: Kimchi's cross-account principal. Contact Kimchi support if you don't already have it.
- A Kimchi API key for the verification request at the end; see the inference quickstart.
Step 1: Choose and set up authentication
Kimchi supports two ways to authenticate with AWS Bedrock: an IAM Role ARN or an access key. Both share the permissions policy in the next section. Set that up first, then follow Option A or Option B. Either option ends with the credential you paste into Step 2.
Permissions policy
The identity Kimchi uses to reach Bedrock needs these three actions.
{
  "Version": "2012-10-17",
  "Statement": [
    {
      "Sid": "BedrockInvoke",
      "Effect": "Allow",
      "Action": [
        "bedrock:InvokeModel",
        "bedrock:InvokeModelWithResponseStream"
      ],
      "Resource": [
        "arn:aws:bedrock:*::foundation-model/*",
        "arn:aws:bedrock:*:<YOUR_ACCOUNT_ID>:inference-profile/*"
      ]
    },
    {
      "Sid": "BedrockDiscovery",
      "Effect": "Allow",
      "Action": "bedrock:ListFoundationModels",
      "Resource": "*"
    }
  ]
}
What each statement allows
| Statement | Actions | What it allows |
|---|---|---|
BedrockInvoke | bedrock:InvokeModel, bedrock:InvokeModelWithResponseStream | Invoke models, both streaming and non-streaming |
BedrockDiscovery | bedrock:ListFoundationModels | Lets Kimchi list the models your account can access |
bedrock:InvokeModelWithResponseStream is a separate IAM action from bedrock:InvokeModel. Kimchi makes both kinds of calls to Bedrock, so your policy needs both.
Replace <YOUR_ACCOUNT_ID> with your AWS account ID. The invoke action resources cover foundation models invoked directly and inference profiles. bedrock:ListFoundationModels does not support resource-level scoping, so its Resource stays "*".
Two ways to grant these permissions. Recommended: save the policy JSON from this section as a customer managed policy and attach it for least privilege. You can also attach a broader pre-packaged policy that you manage centrally. Either way, the policy must include at least the three actions in the JSON from this section.
Option A: IAM Role ARN
Choose the IAM Role ARN option when your security posture does not allow long-lived stored credentials. Kimchi assumes your role over a cross-account trust relationship on each request, so Kimchi stores no secret. AWS also recommends roles over long-term access keys; see IAM security best practices.
Trust policy
Your role trusts the Kimchi service principal, which you get from Kimchi support. KIMCHI_EXTERNAL_PRINCIPAL is the AWS principal on Kimchi's side that your role must trust; contact support if you don't already have it.
To create the role:
- Go to IAM → Roles → Create role.
- Under Trusted entity type, choose AWS account → Another AWS account. Paste
KIMCHI_EXTERNAL_PRINCIPALinto Account ID. - On the Add permissions page, create a customer managed policy from the minimal JSON and attach it. Or attach a broader pre-packaged policy that includes at least those actions.
- Name the role and choose Create role. The name is up to you; Kimchi references the role by its ARN, not its name.
For the full console walkthrough, see the AWS docs on creating a role that delegates permissions to an AWS account.
The console flow produces a trust policy equivalent to this JSON:
{
  "Version": "2012-10-17",
  "Statement": [
    {
      "Sid": "AllowKimchi",
      "Effect": "Allow",
      "Principal": {
        "AWS": "KIMCHI_EXTERNAL_PRINCIPAL"
      },
      "Action": "sts:AssumeRole"
    }
  ]
}
Copy the ARN from the role summary in IAM. You need it for the Kimchi console step.
Option B: Access Key & Secret
Kimchi stores the key in an encrypted form and shows only the last 4 characters in the console.
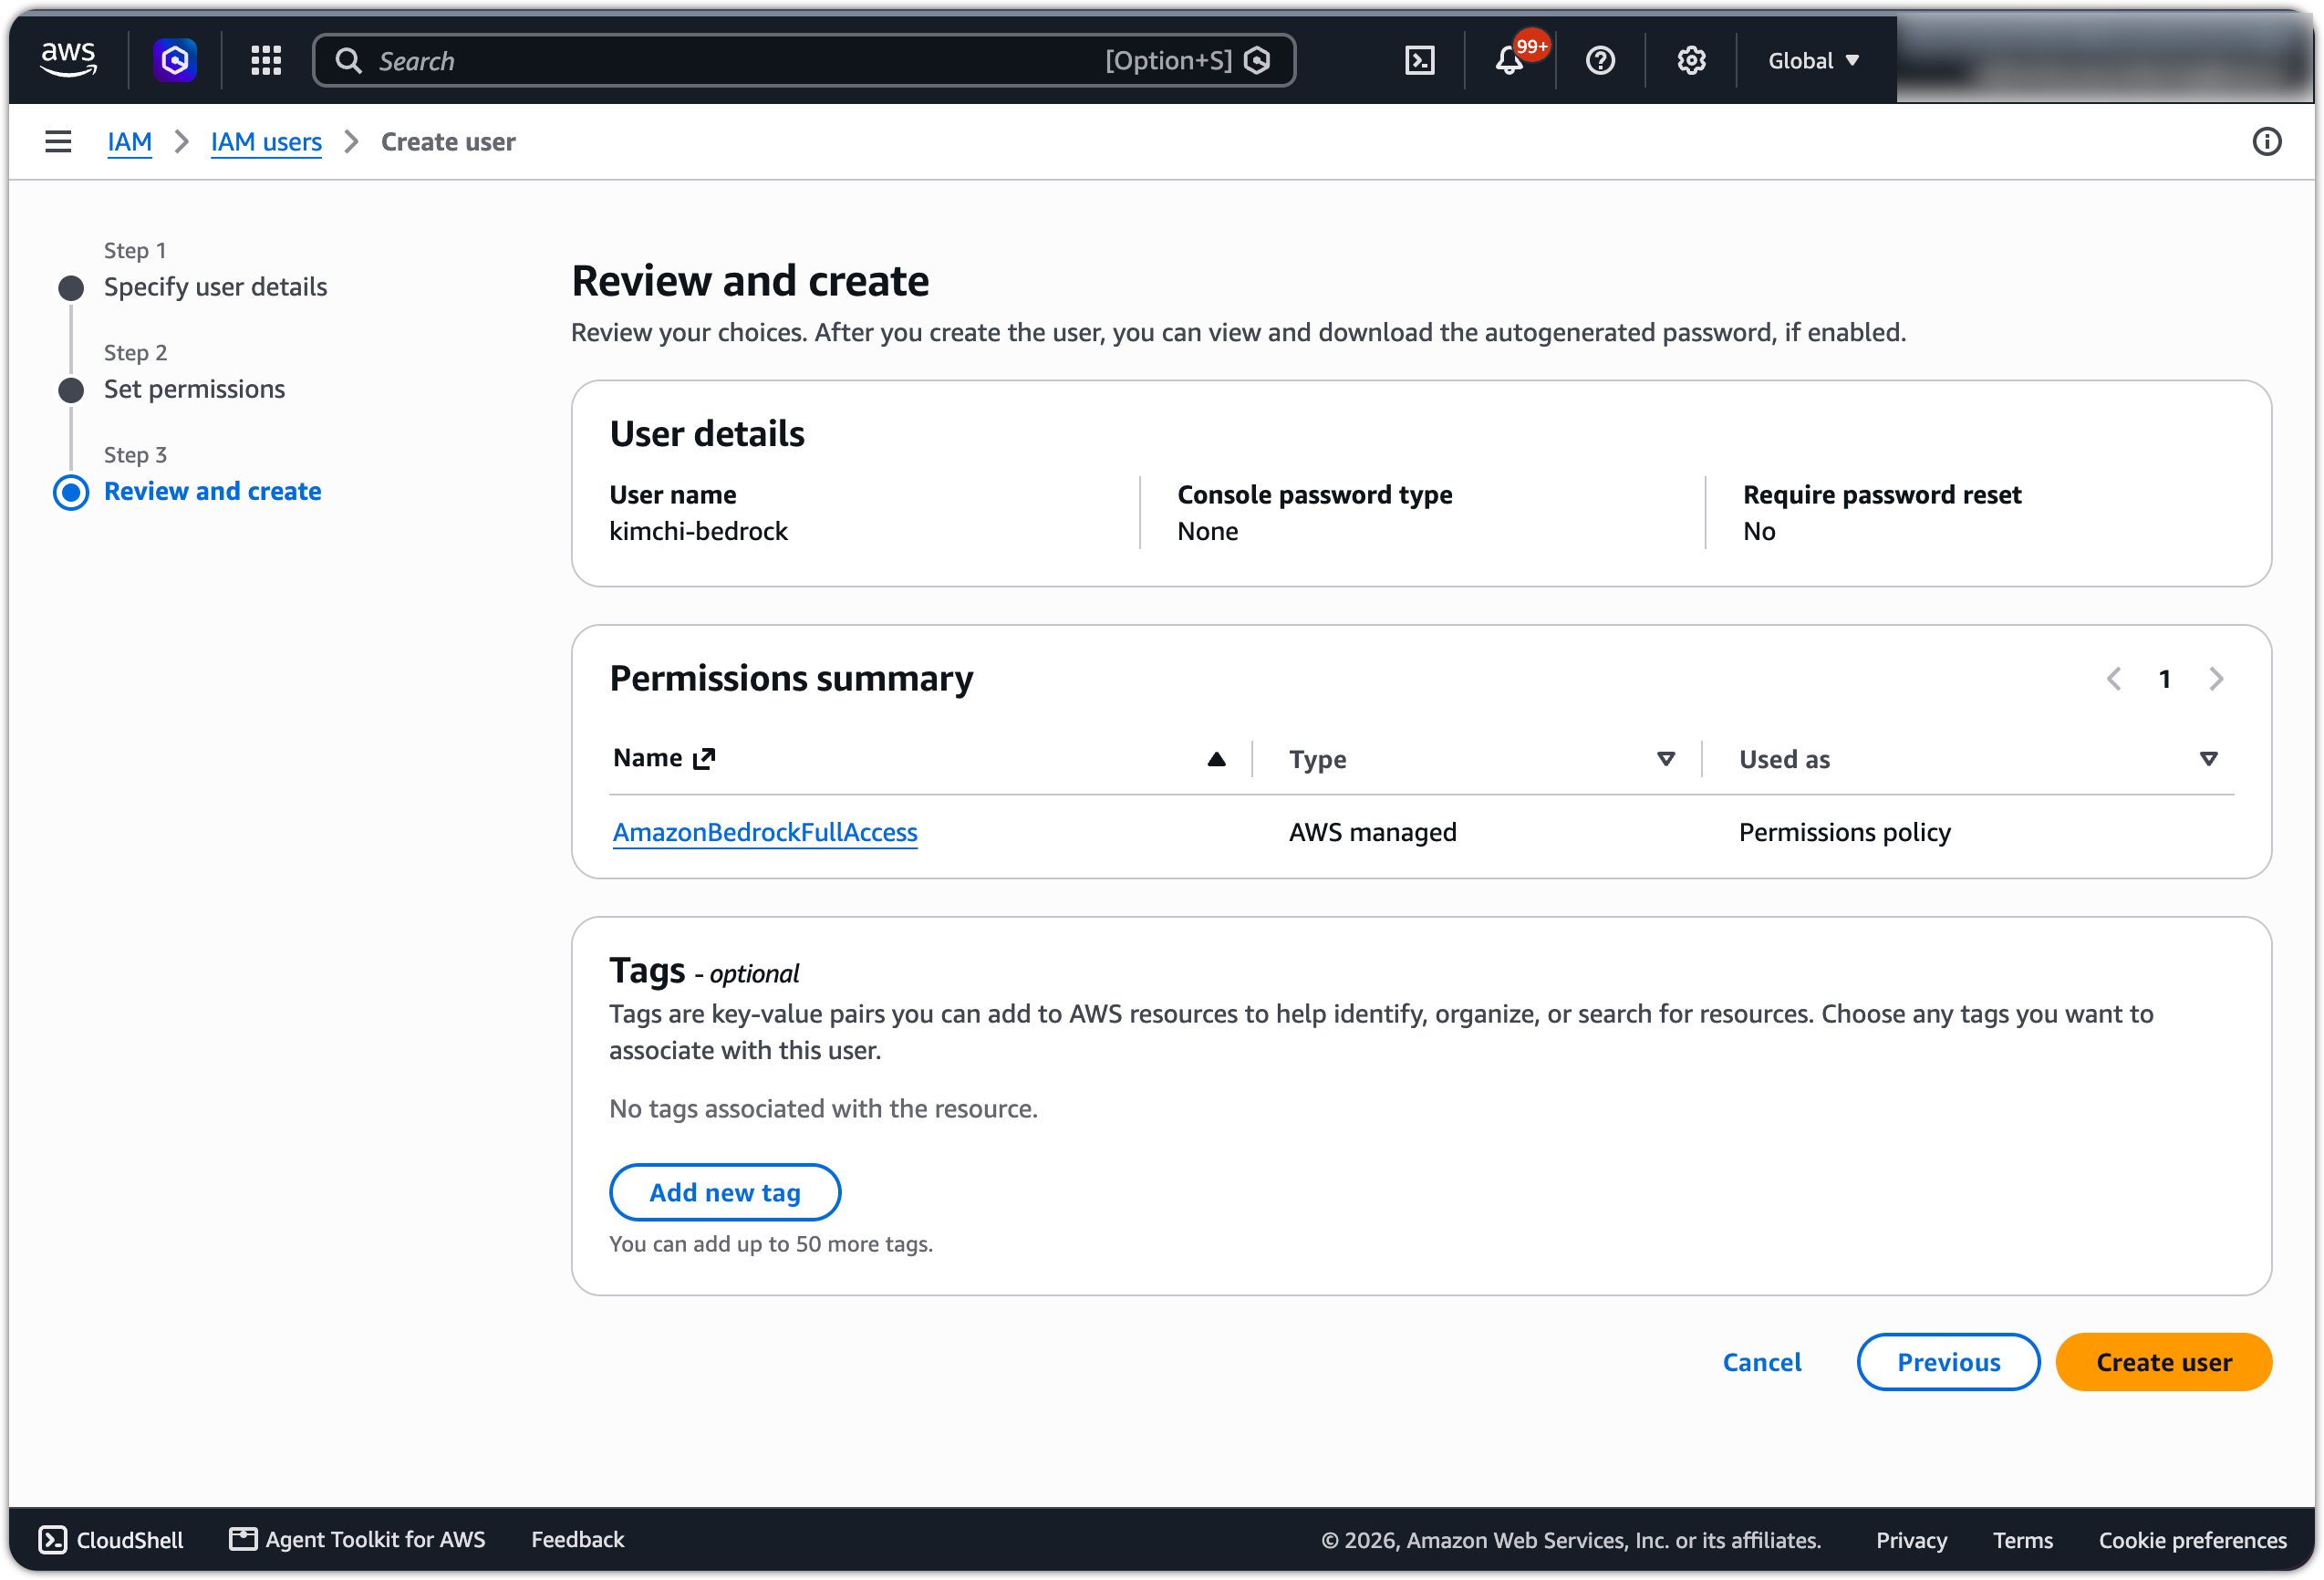
Create an IAM user with the Bedrock policy
- Go to IAM → Users → Create user. Enter a user name, for example
kimchi-bedrock. Leave console access off; this IAM user does not need it. - On the Set permissions page, choose Attach policies directly.
- Attach the minimal permissions policy you saved as a customer managed policy. Or attach a broader pre-packaged policy that includes at least those actions.
Generate an access key
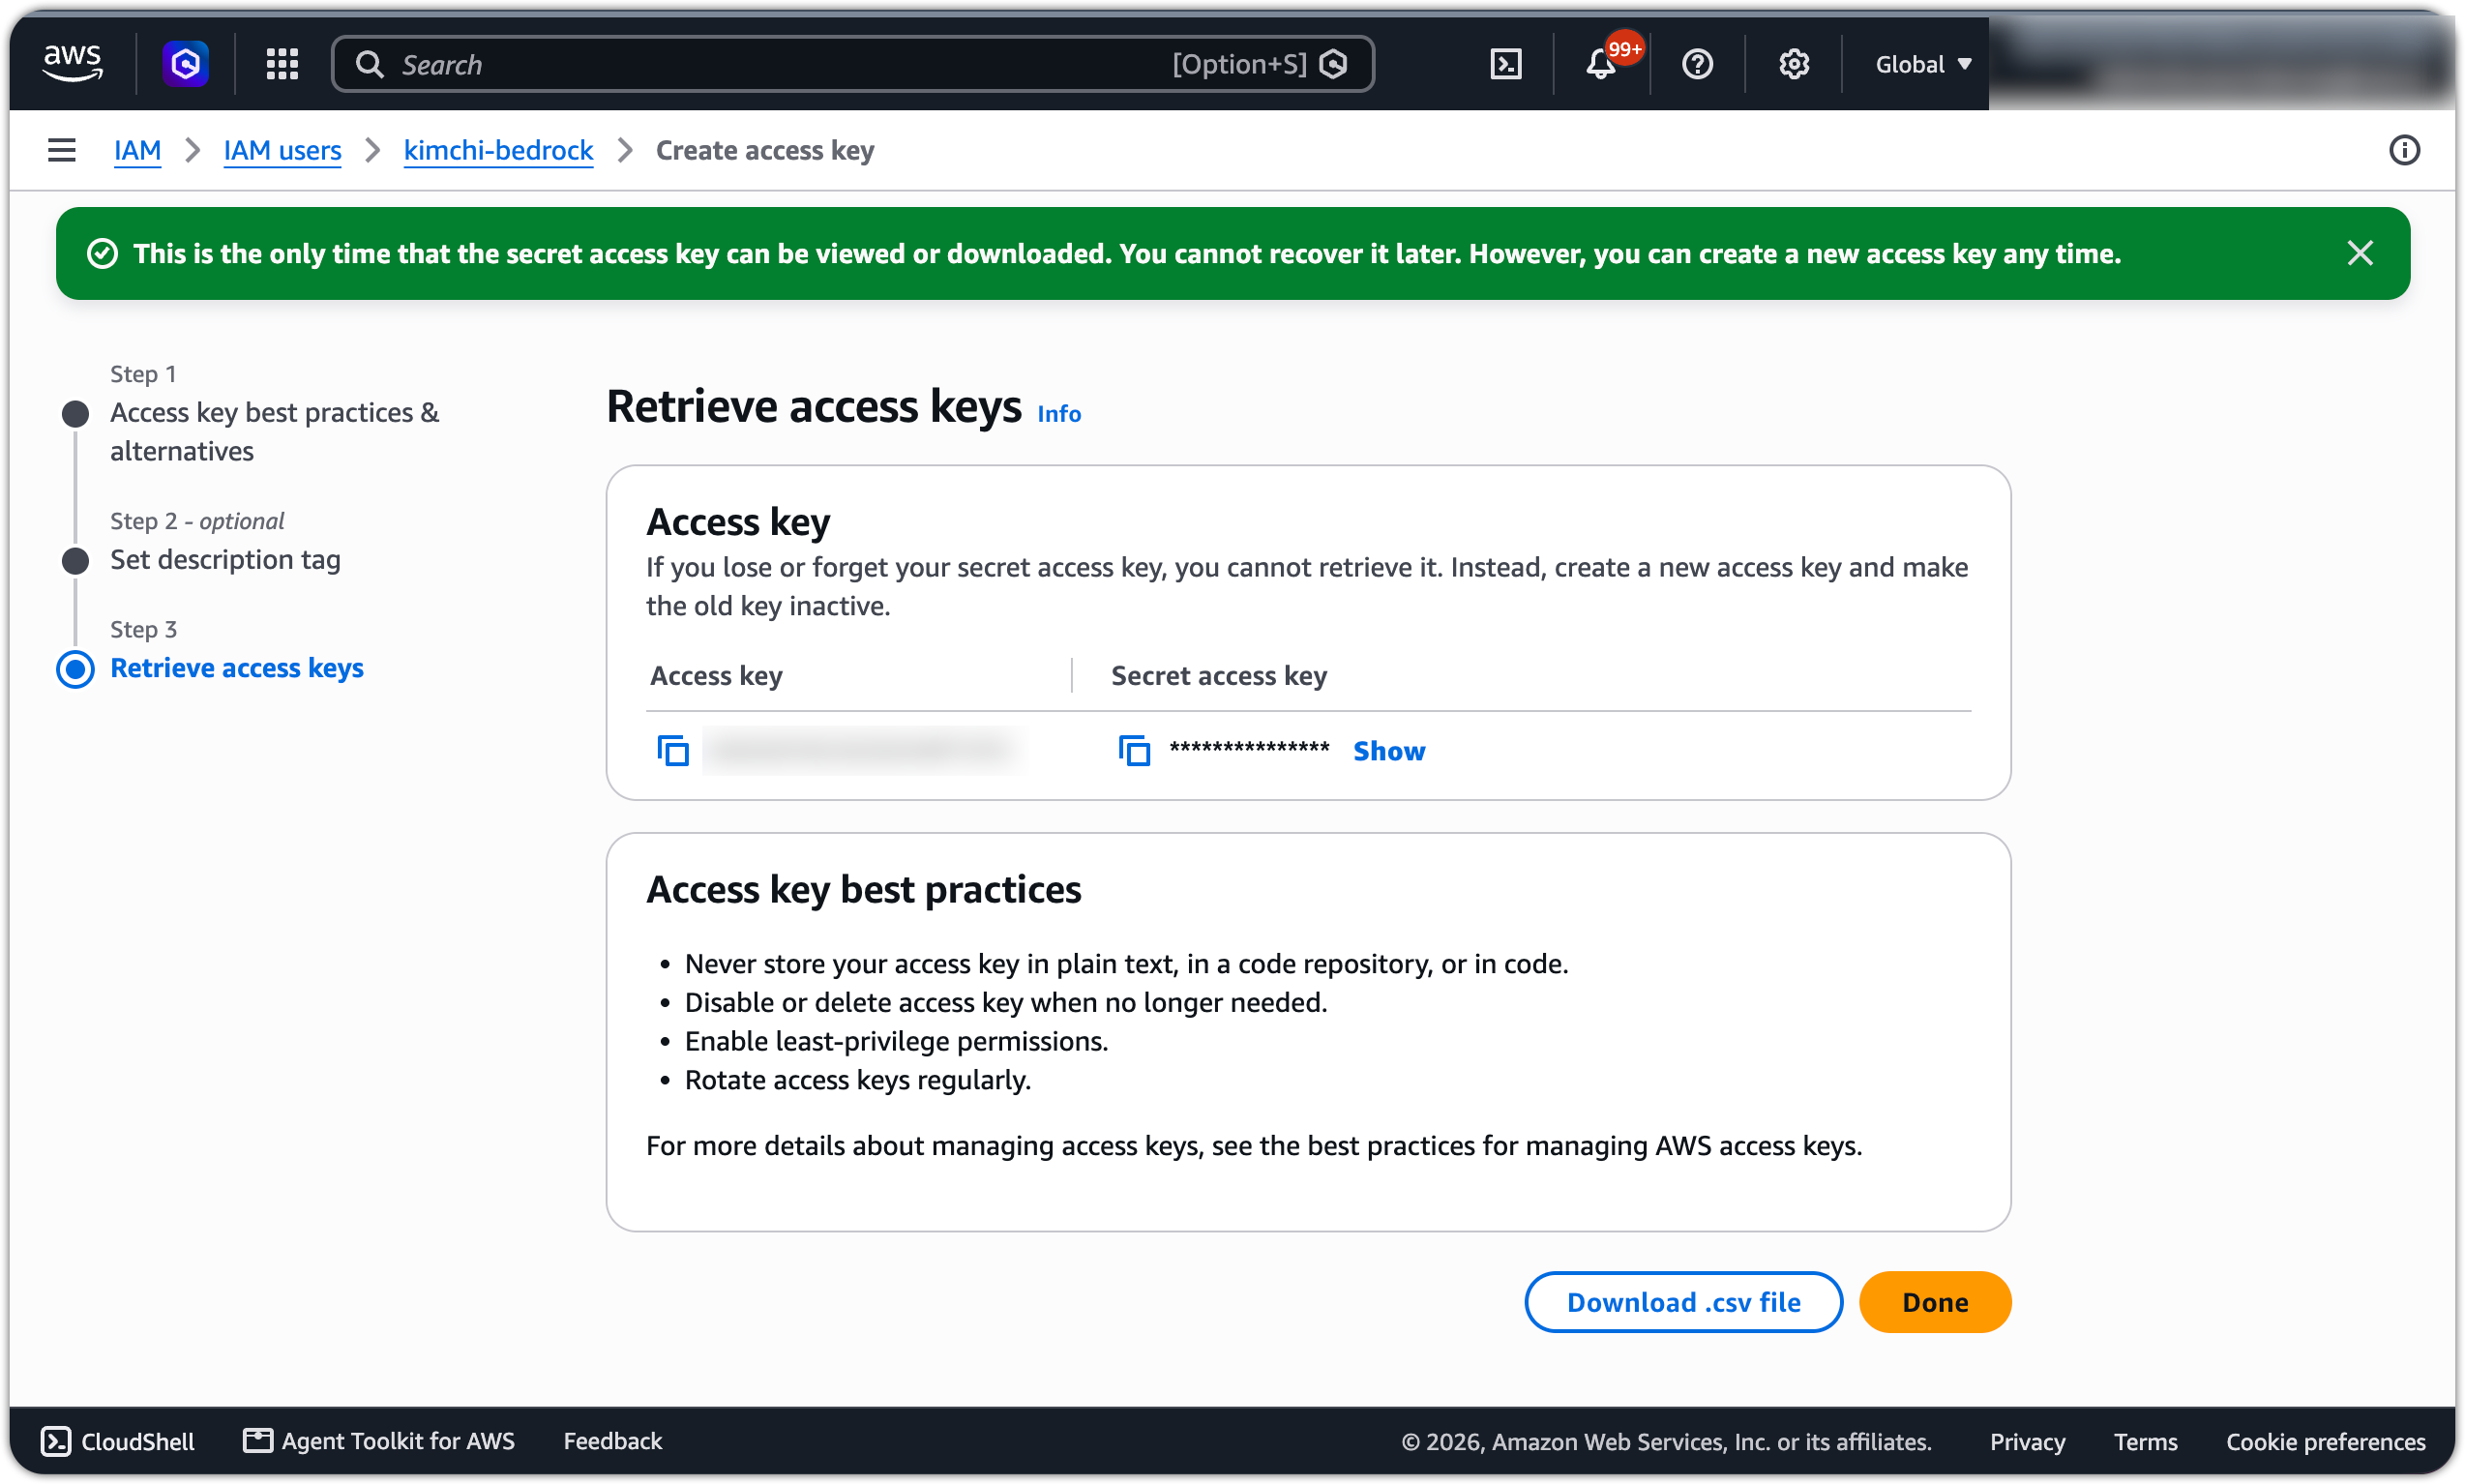
- Open the user, go to Security credentials, and choose Create access key.
- On the Access key best practices & alternatives page, select Third-party service as the use case. Tick the confirmation checkbox and choose Next.
- Choose Create access key.
Copy both the Access key ID and Secret access key; AWS shows the secret only once. For the full flow, see the AWS docs on managing access keys for IAM users.
Step 2: Add the provider in the Kimchi console
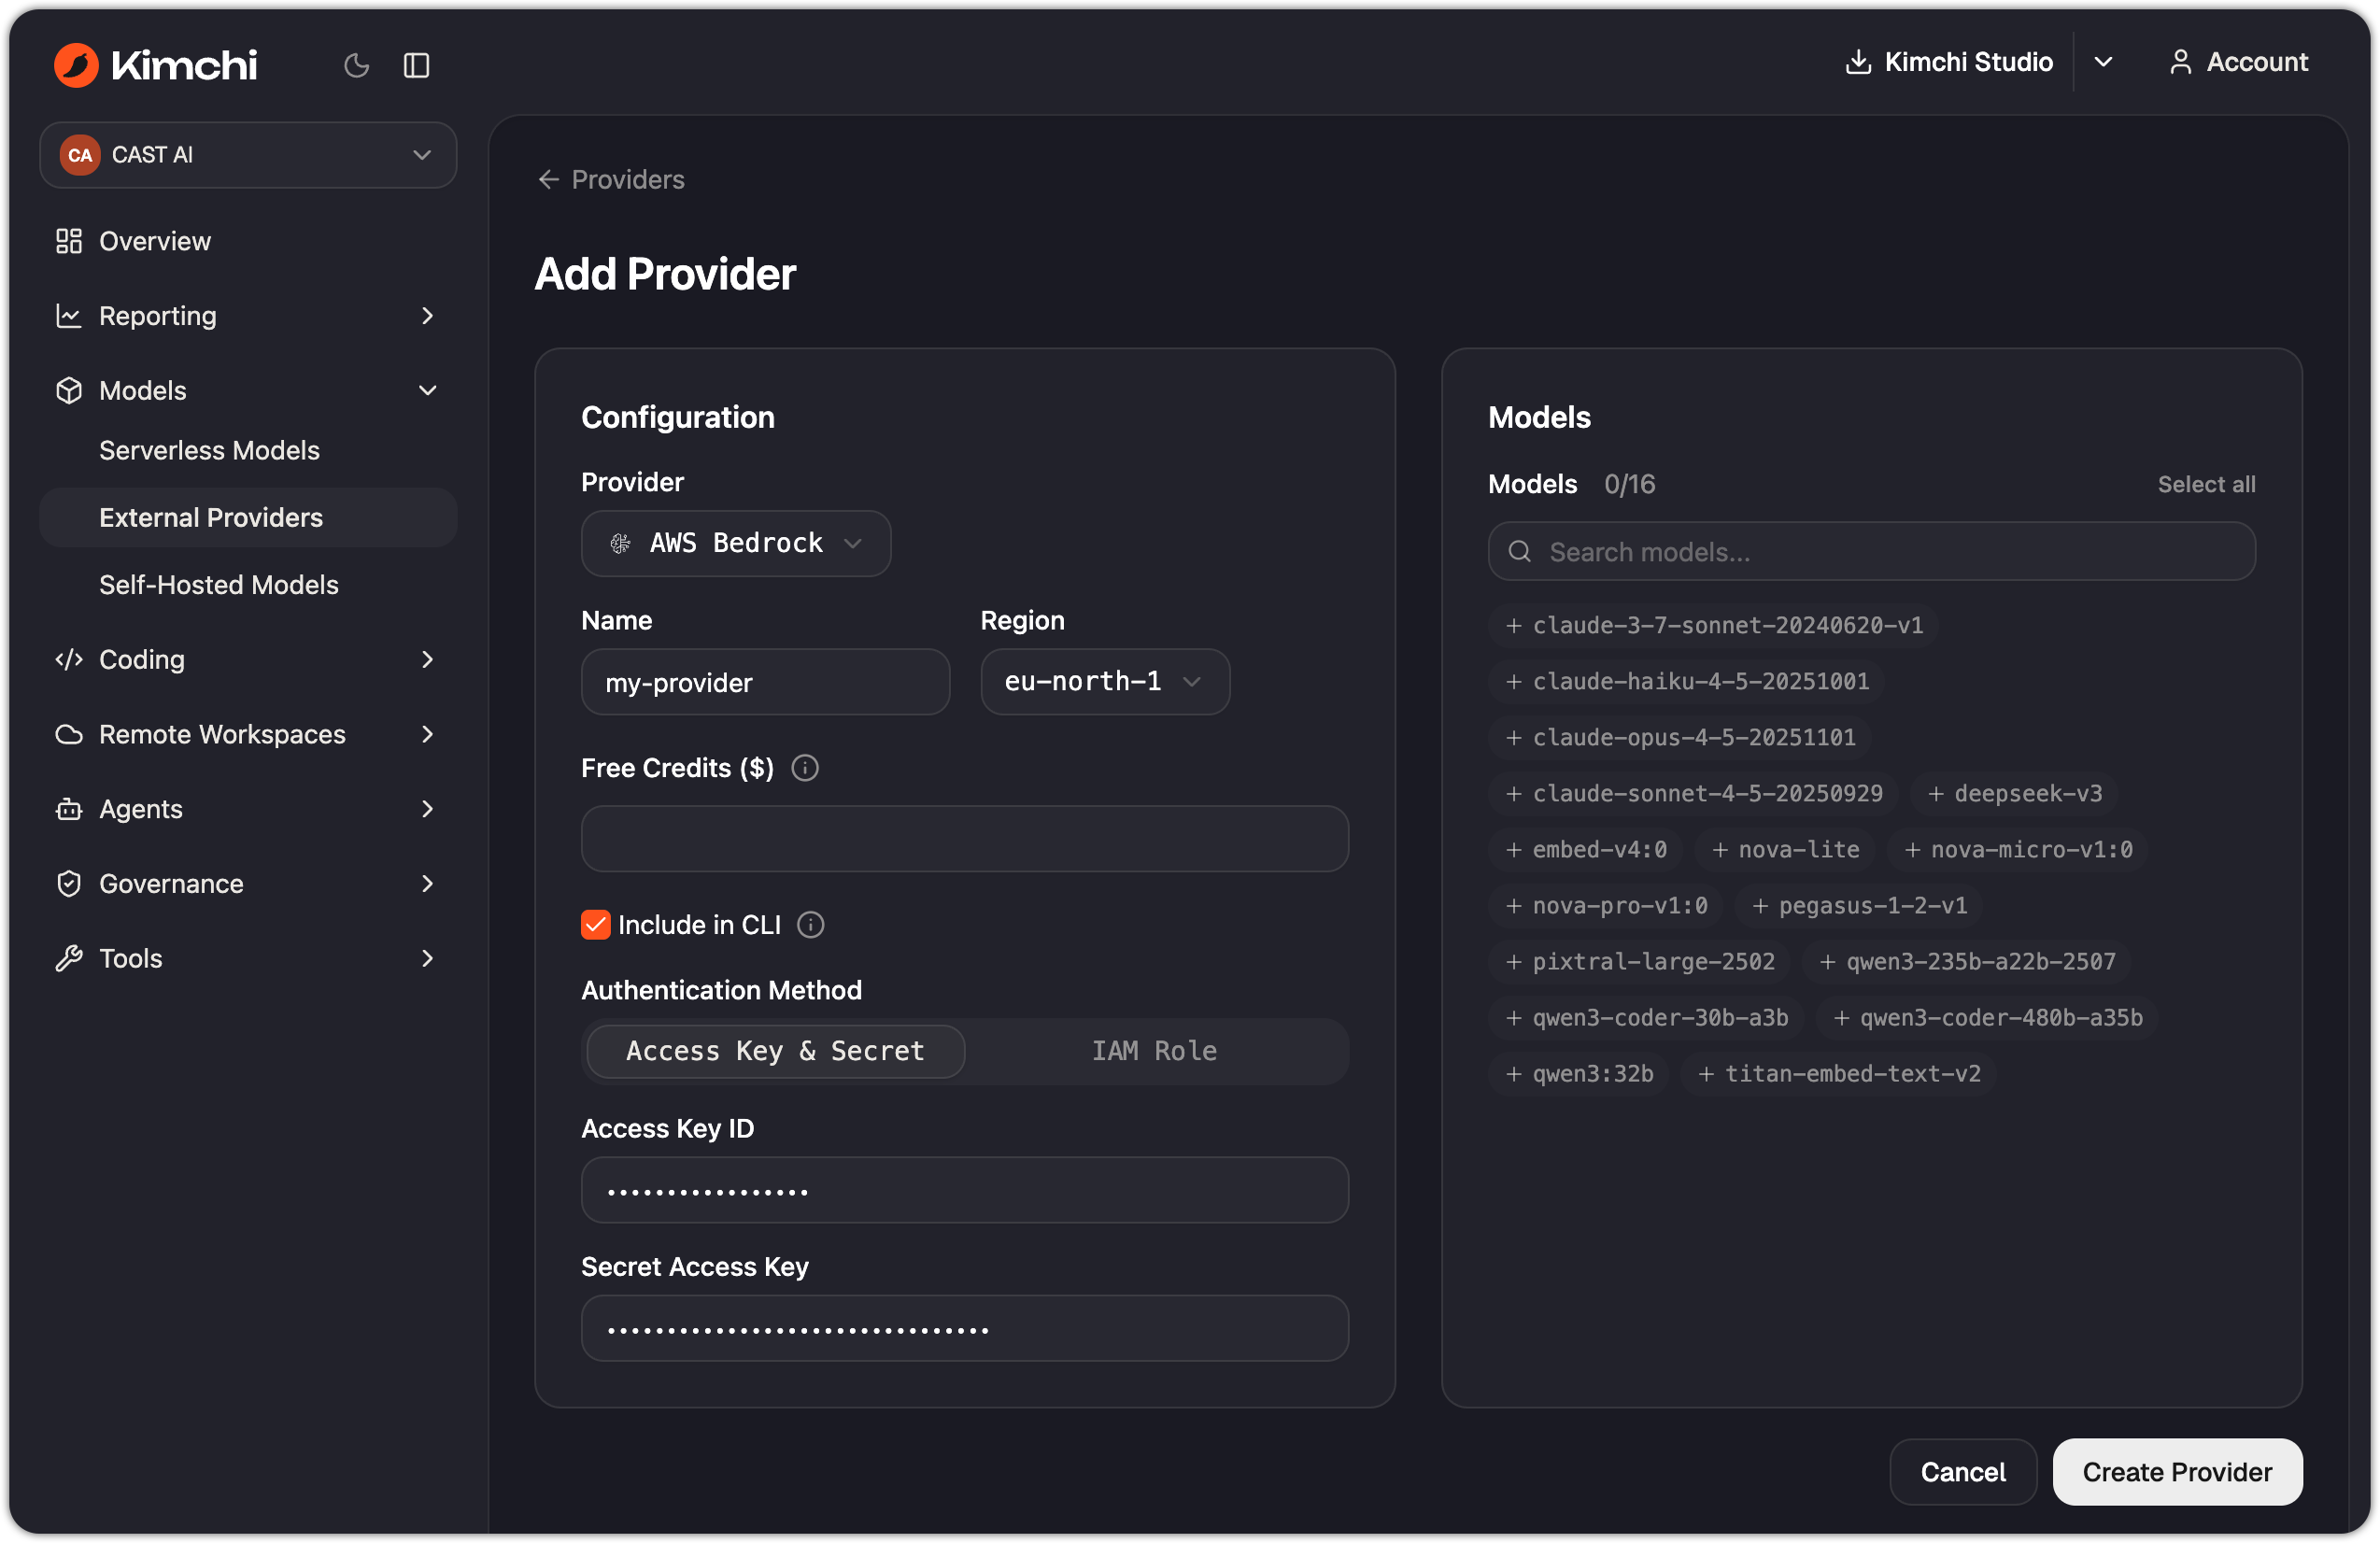
You register the provider on the Add Provider page, which has a Configuration panel on the left and a Models panel on the right. The Models panel stays empty until you select a provider and a region, then lists the Bedrock models available in that region.
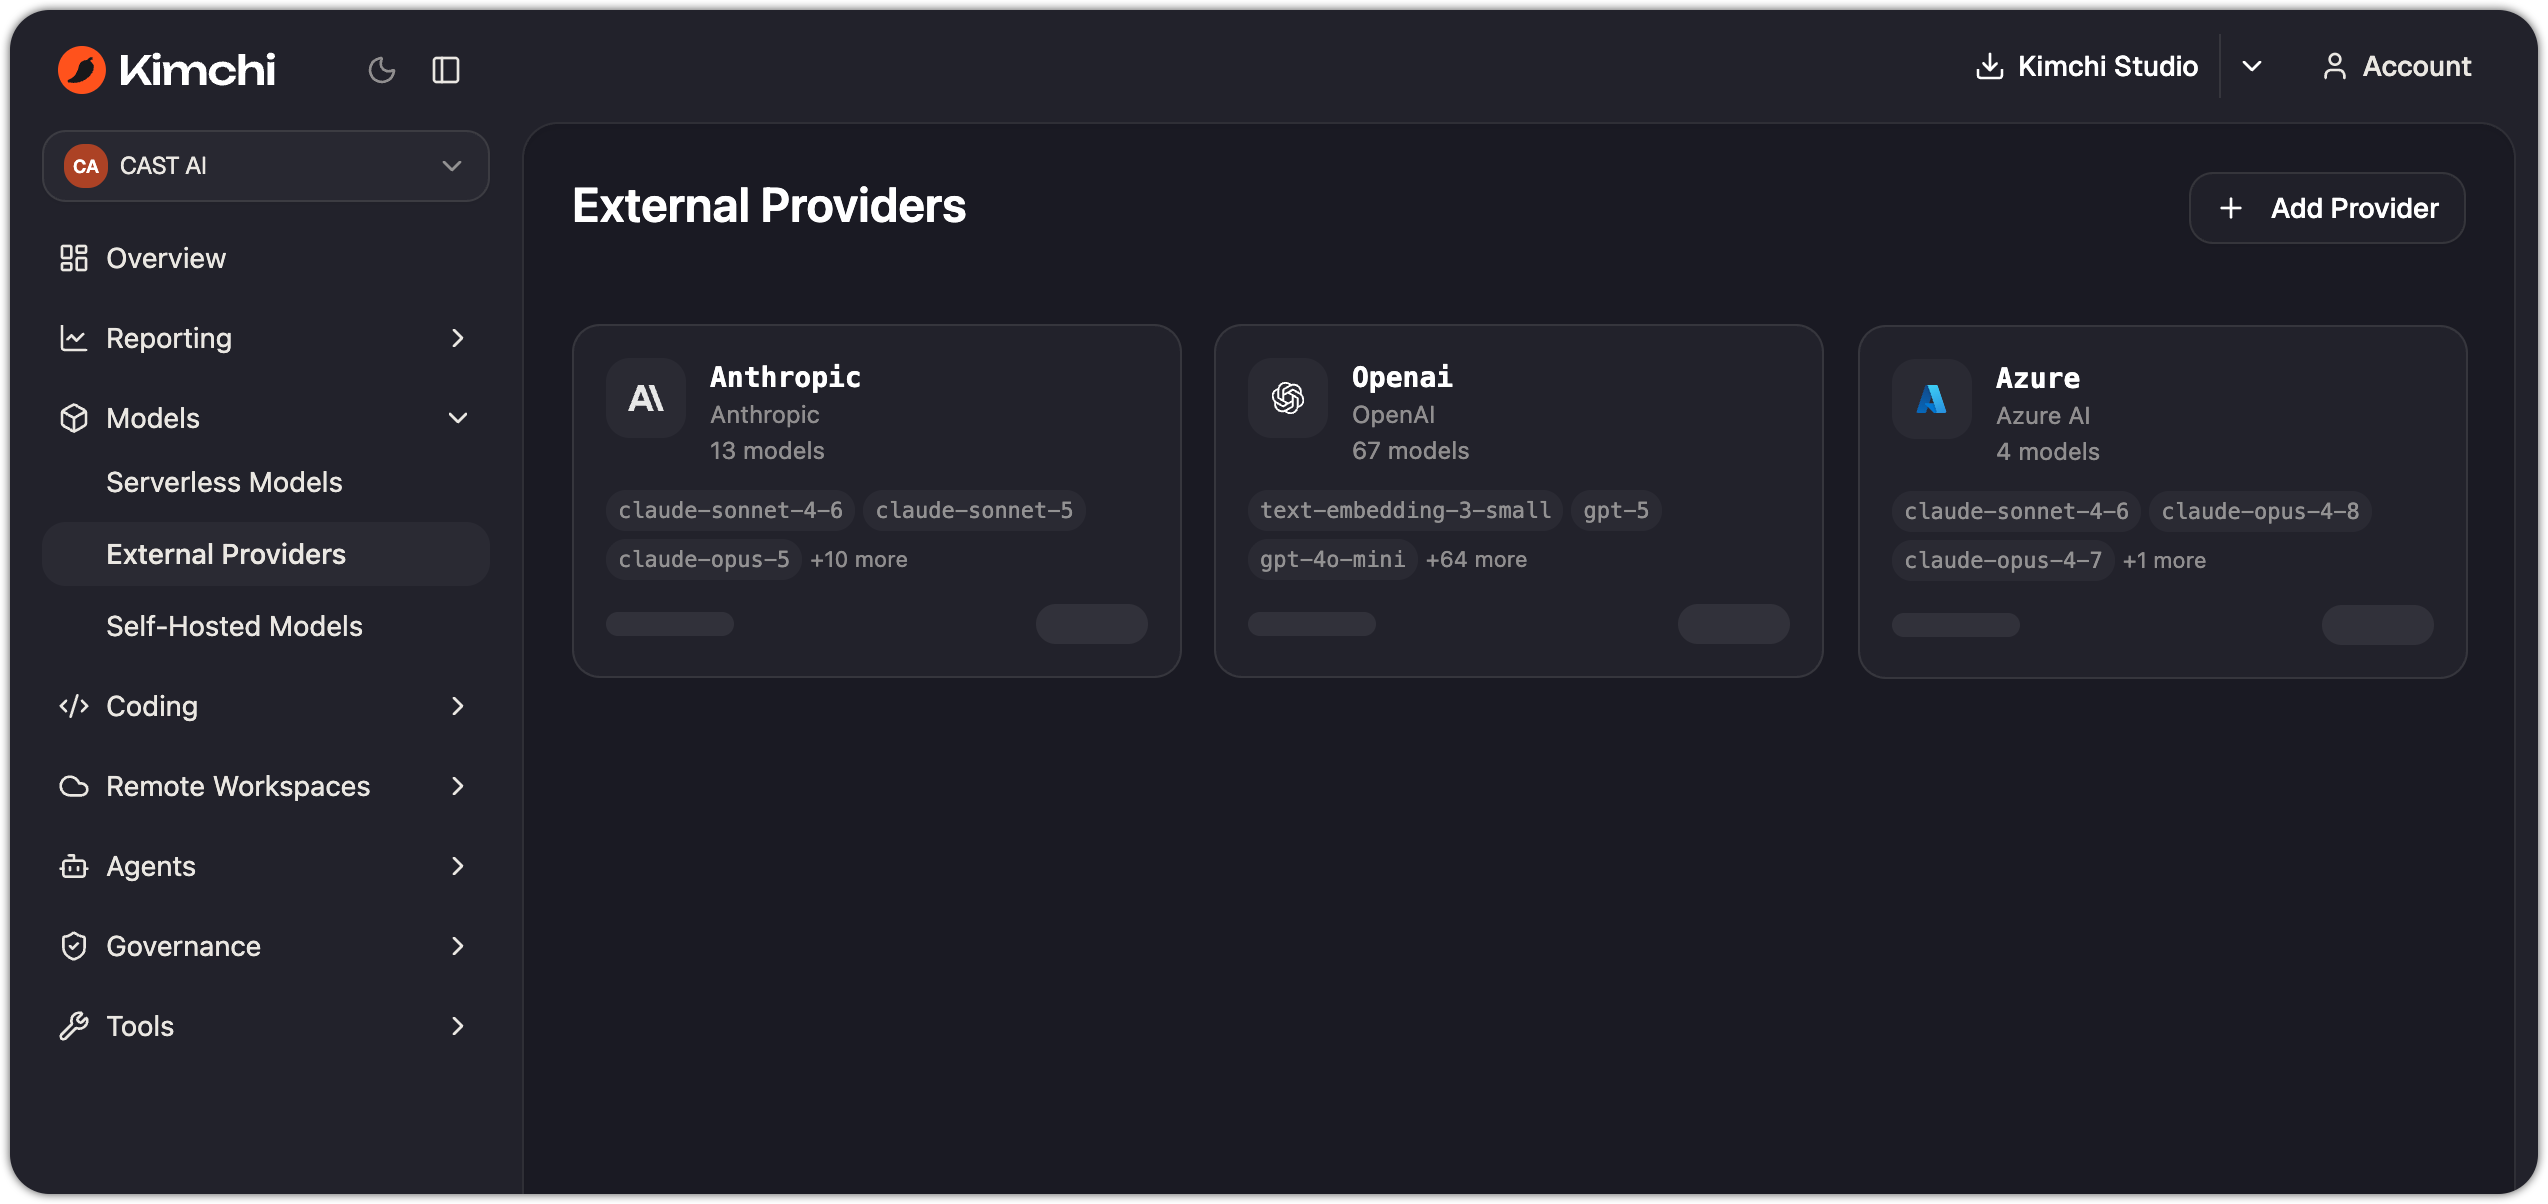
Open Add Provider
In the Kimchi console sidebar, go to Models > External Providers and click + Add Provider.
Select AWS Bedrock and the region
In the Configuration panel, set Provider to AWS Bedrock. Two fields appear:
- Name: enter a name your team will recognize, for example
bedrock-us-east-1. - Region: pick the AWS region where you enabled Bedrock model access.
When you select a region, the Models panel on the right lists the models your AWS account can access there.
Choose the authentication method
Use IAM Role if your security posture disallows long-lived stored credentials, otherwise Access Key & Secret. The credential field changes with your choice:
Paste the Access Key ID and Secret Access Key from Option B in Step 1. When you edit an existing provider, leave both blank to keep the stored values.
Set the provider options
Two optional settings appear in every provider configuration:
- Free Credits ($): free credits provided by your LLM provider. Enter the amount so Kimchi can calculate accurate cost savings in Reporting; leave empty if your provider gives you none.
- Include in CLI: when enabled, this provider's models appear in the CLI model list. When disabled, the provider stays connected to Kimchi for gateway traffic, but its models are not available in the CLI.
Select models and create the provider
In the Models panel on the right, select the models to enable. Then click Create Provider at the bottom right.
Kimchi stores only the last 4 characters of access keys for reporting.
Kimchi encrypts credentials and uses them only to route requests.
Verify the connection
Send a request to the Kimchi endpoint with one of the Bedrock models you registered. Replace the model ID with one from your model list.
Replace <your-kimchi-api-key> on the Authorization line with your actual Kimchi API key, then run the request.
curl https://llm.kimchi.dev/openai/v1/chat/completions \
  -H "Content-Type: application/json" \
  -H "Accept: application/json" \
  -H "Authorization: Bearer <your-kimchi-api-key>" \
  -X POST \
  -d '{
    "model": "<your-bedrock-model-id>",
    "messages": [
      {
        "role": "user",
        "content": "Test the connection"
      }
    ]
  }'
A successful response means Kimchi can reach Bedrock. If the request fails, see Troubleshooting. When you save the provider, the console checks only that the fields are non-empty; it does not test the assume chain or the Bedrock permissions.
Troubleshooting
AccessDenied on invoke
Likely cause: the permission policy is missing bedrock:InvokeModel.
Fix: add both invoke actions from the Permissions policy in Step 1.
Invoking works for some requests but fails when streaming
Likely cause: the permission policy is missing bedrock:InvokeModelWithResponseStream.
Fix: add it; Kimchi streams by default.
AccessDeniedException on assume role
Likely cause: the trust policy names the wrong principal.
Fix: compare your trust policy with the JSON in Option A and re-create the provider. Saving the provider checks only that the Role ARN field is non-empty.
First request fails with an authentication or assume-role error
Likely cause: the trust policy, principal, or region is wrong, or the IAM role in the Role ARN field does not exist.
Fix: confirm the ARN and principal, then delete and re-create the provider. The console does not test these values on save.
Model not listed, or ValidationException when called
Likely cause: the model isn't enabled for your account yet. Anthropic models sometimes need use-case details on first invoke. AWS Marketplace models need a one-time invocation by a user with IAM permissions.
Fix: invoke the model once in the AWS console, for example in the Bedrock playground. Submit the use-case details if AWS prompts you.
No models appear in the Region dropdown
Likely cause: the console has the wrong AWS account or region for the provider.
Fix: switch the provider to the account and region where you granted model access.
See also
Updated 4 days ago